I came up with a different way to display a spider plant – the aerial way!

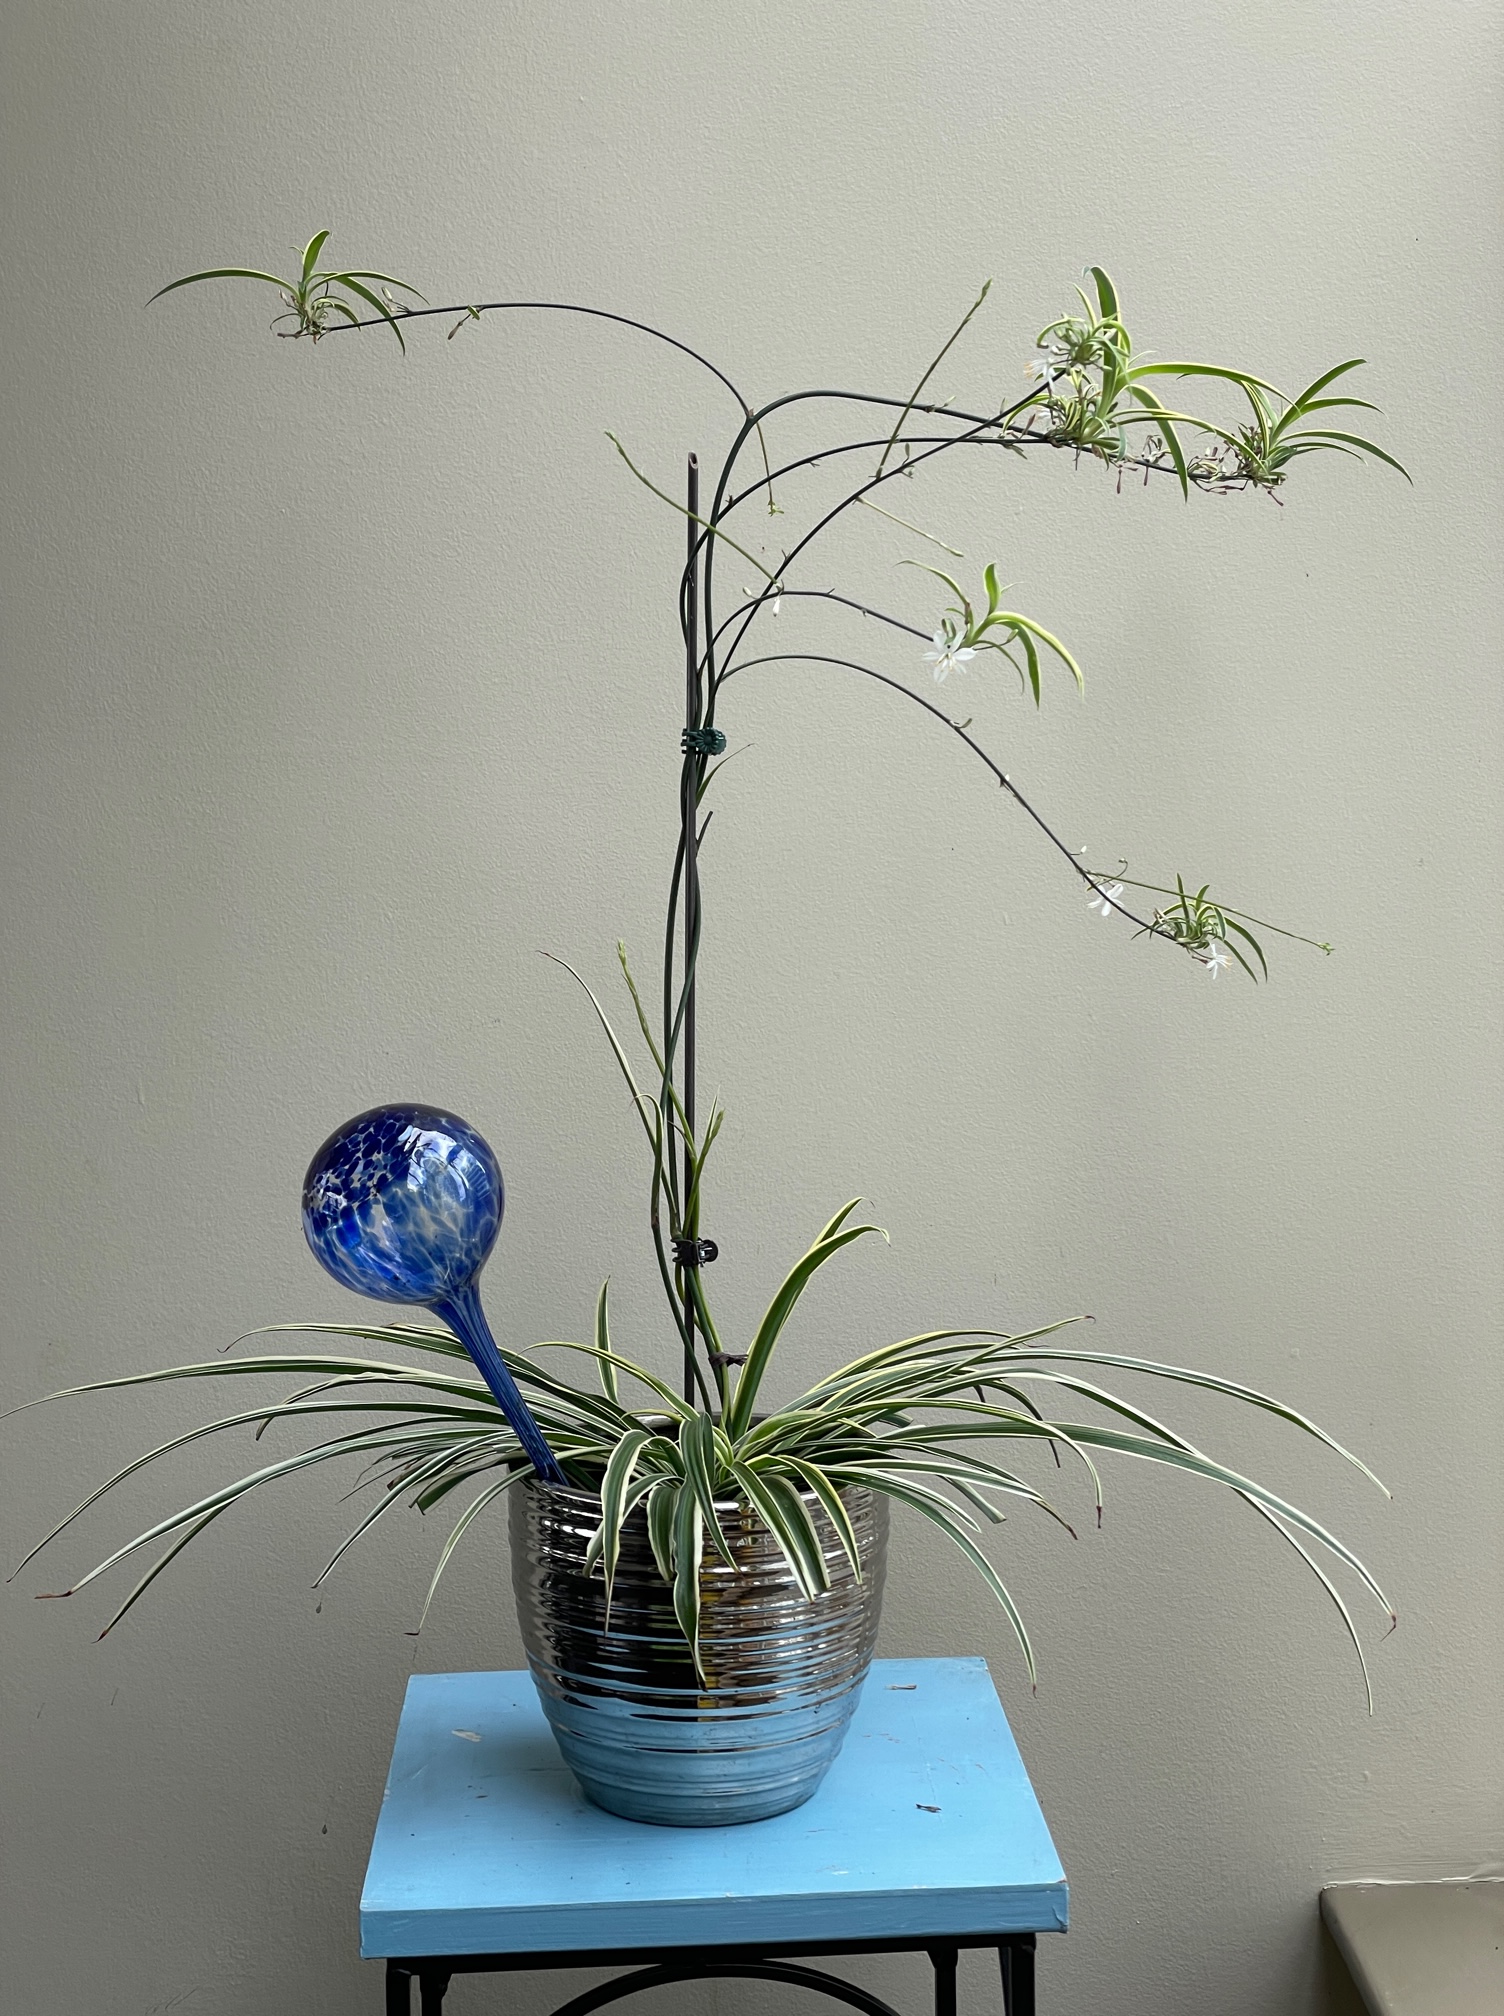
This past May 2022 I came up with a different way to display the typical spider plant with babies! Instead of letting it hang like a typical hanging plant, I used a couple of plant supports previously used for orchids. The stems of the new babies are quite thick and with some clips I gathered up all the hanging stems and created a more aerial display. From afar it may look like air plants. You can see from the image in May compared to the one I took in August that the baby spider plant doesn’t grow as big. I keep it trimmed to keep from weighing down.

I love this display as it doesn’t look too messy and it has an architectural touch to it. I searched online looking for any reference or image of this kind of display for spider plant and I could not find any! Is it possible that I came up with an original idea?? Would you display your spider plant this way? If you do, please let me know and share images!

Spider plant with babies displayed the aerial way. Photo credit: Marilou Strait. Taken May 2022
Updated photo of the same spider plant aerial display. Photo credit: Marilou Strait. Photo taken August 2022

How to make a Modular Origami Star

star-origami-red-box

Start off with a square paper. The size depends on how big you want your star to be. If you choose a heavier stock, it will be more difficult to fold and crease the paper. The result will also be bulky. The paper I used in these samples are origami paper, regular printer paper (20 lb. stock) and a stationery paper (a little heavier than 20 lb. stock).

Step by Step

  • Step 1 : Start with a square paper; Step 2: Make two creases by folding the paper horizontally and verticallystep-1-2
  • Step 3: Fold each corner into the centre – it will form a smaller square
  • Step 4: Fold one of the sides into the centre making a triangle – Make sure the
    tip is well creased. This will be the point of the star and will be visible. Do the same on the other side.step-3-4-5
  • Step 5: Turn over the paper Make a crease that aligns where the folded part.

step-6

  • Step 6: Fold the middle of the paper

step-7

  • Repeat with the other

Assembly

  • Step 1: Line up two modules and inner the point of the module into the “pocket” of another module

step-8

  • Step 2: Repeat until you can close to make a circle.

step-9

Here are samples of different size star

step-10

Here’s how I used the smallest star. I made cubes of graduated size using a discarded file folder. Here’s the link to the cube template.

star-origami-red-box2

A Tulip Study in 3 Different Mediums

Creating  art of the same subject in different mediums - A Tulip Study

For the last little while i have been doing healthy and kid-friendly recipes, now it is time to vary things a little bit with some art – a study of a subject. In the past, I have done studies of one subject in the same medium. This time I did one subject, tulips, in 3 very different mediums – a photograph, a pencil drawing and a vector drawing. This just happened spontaneously and in retrospect, I believe it would be good to do this more often.

How To Do A Study of One Subject in Different Mediums

  1. Take pictures. Start with a close up view of your subject and take pictures. – whatever camera you have will do. Take the time to compose it and in different angles.
  2. Sketch. I carry a small sketch book with me and use it when there’s opportunity to do even a quick sketch using a printed photograph or straight from a phone camera. I find that sketching by hand really helps in understanding the shapes, proportion and subtle colour shifts and gradients. Do  more than one if you can.
  3. Create a vector art without looking at your reference material (photograph or sketch).  Use the reference material only after you’ve tried digital drawing from memory. You’ll be amazed how much you can remember of the subject.
  4. Fine tune. Now you can refers to the reference materials and make changes to your vector art.
  5. Compare all your art work, just as I did here side by side.

Try it! You’ll get to understand more about your choice subject and as I found it, the approach I took in creating each art improved.

Wallpaper calendar for July 2013

Here’s another desktop wallpaper calendar I would like to share with you, this time for July 2013. The yellow and purple colour scheme and the simplicity of the floral arrangement makes this so refreshing in the heat of summer. The pale yellow with a little pink blush on the rose and the lavender sprigs were all from the garden. I hope you enjoy it.

calendar-2013-07